DIY Halloween Banner
I almost titled this post “Easy Halloween Banner” but quickly realized how many times I’ve used “Easy” in my previous titles, ha! But the truth is, easy is my jam! I like a lot of bang for my buck, or time ;)

My oldest actually came up with this idea and executed it with her siblings while I was making dinner one night. I was so impressed and like “Are you sure you didn’t see this in a magazine or something?!” But also, my creative heart skipped a beat to see a trait of mine working within her...she’s a creator, just like me! With her help, we created this tutorial for you!
Materials needed:
-construction paper or card stock in colors of your choice
-scissors
-glue or tape
-string or yarn

Step 1:
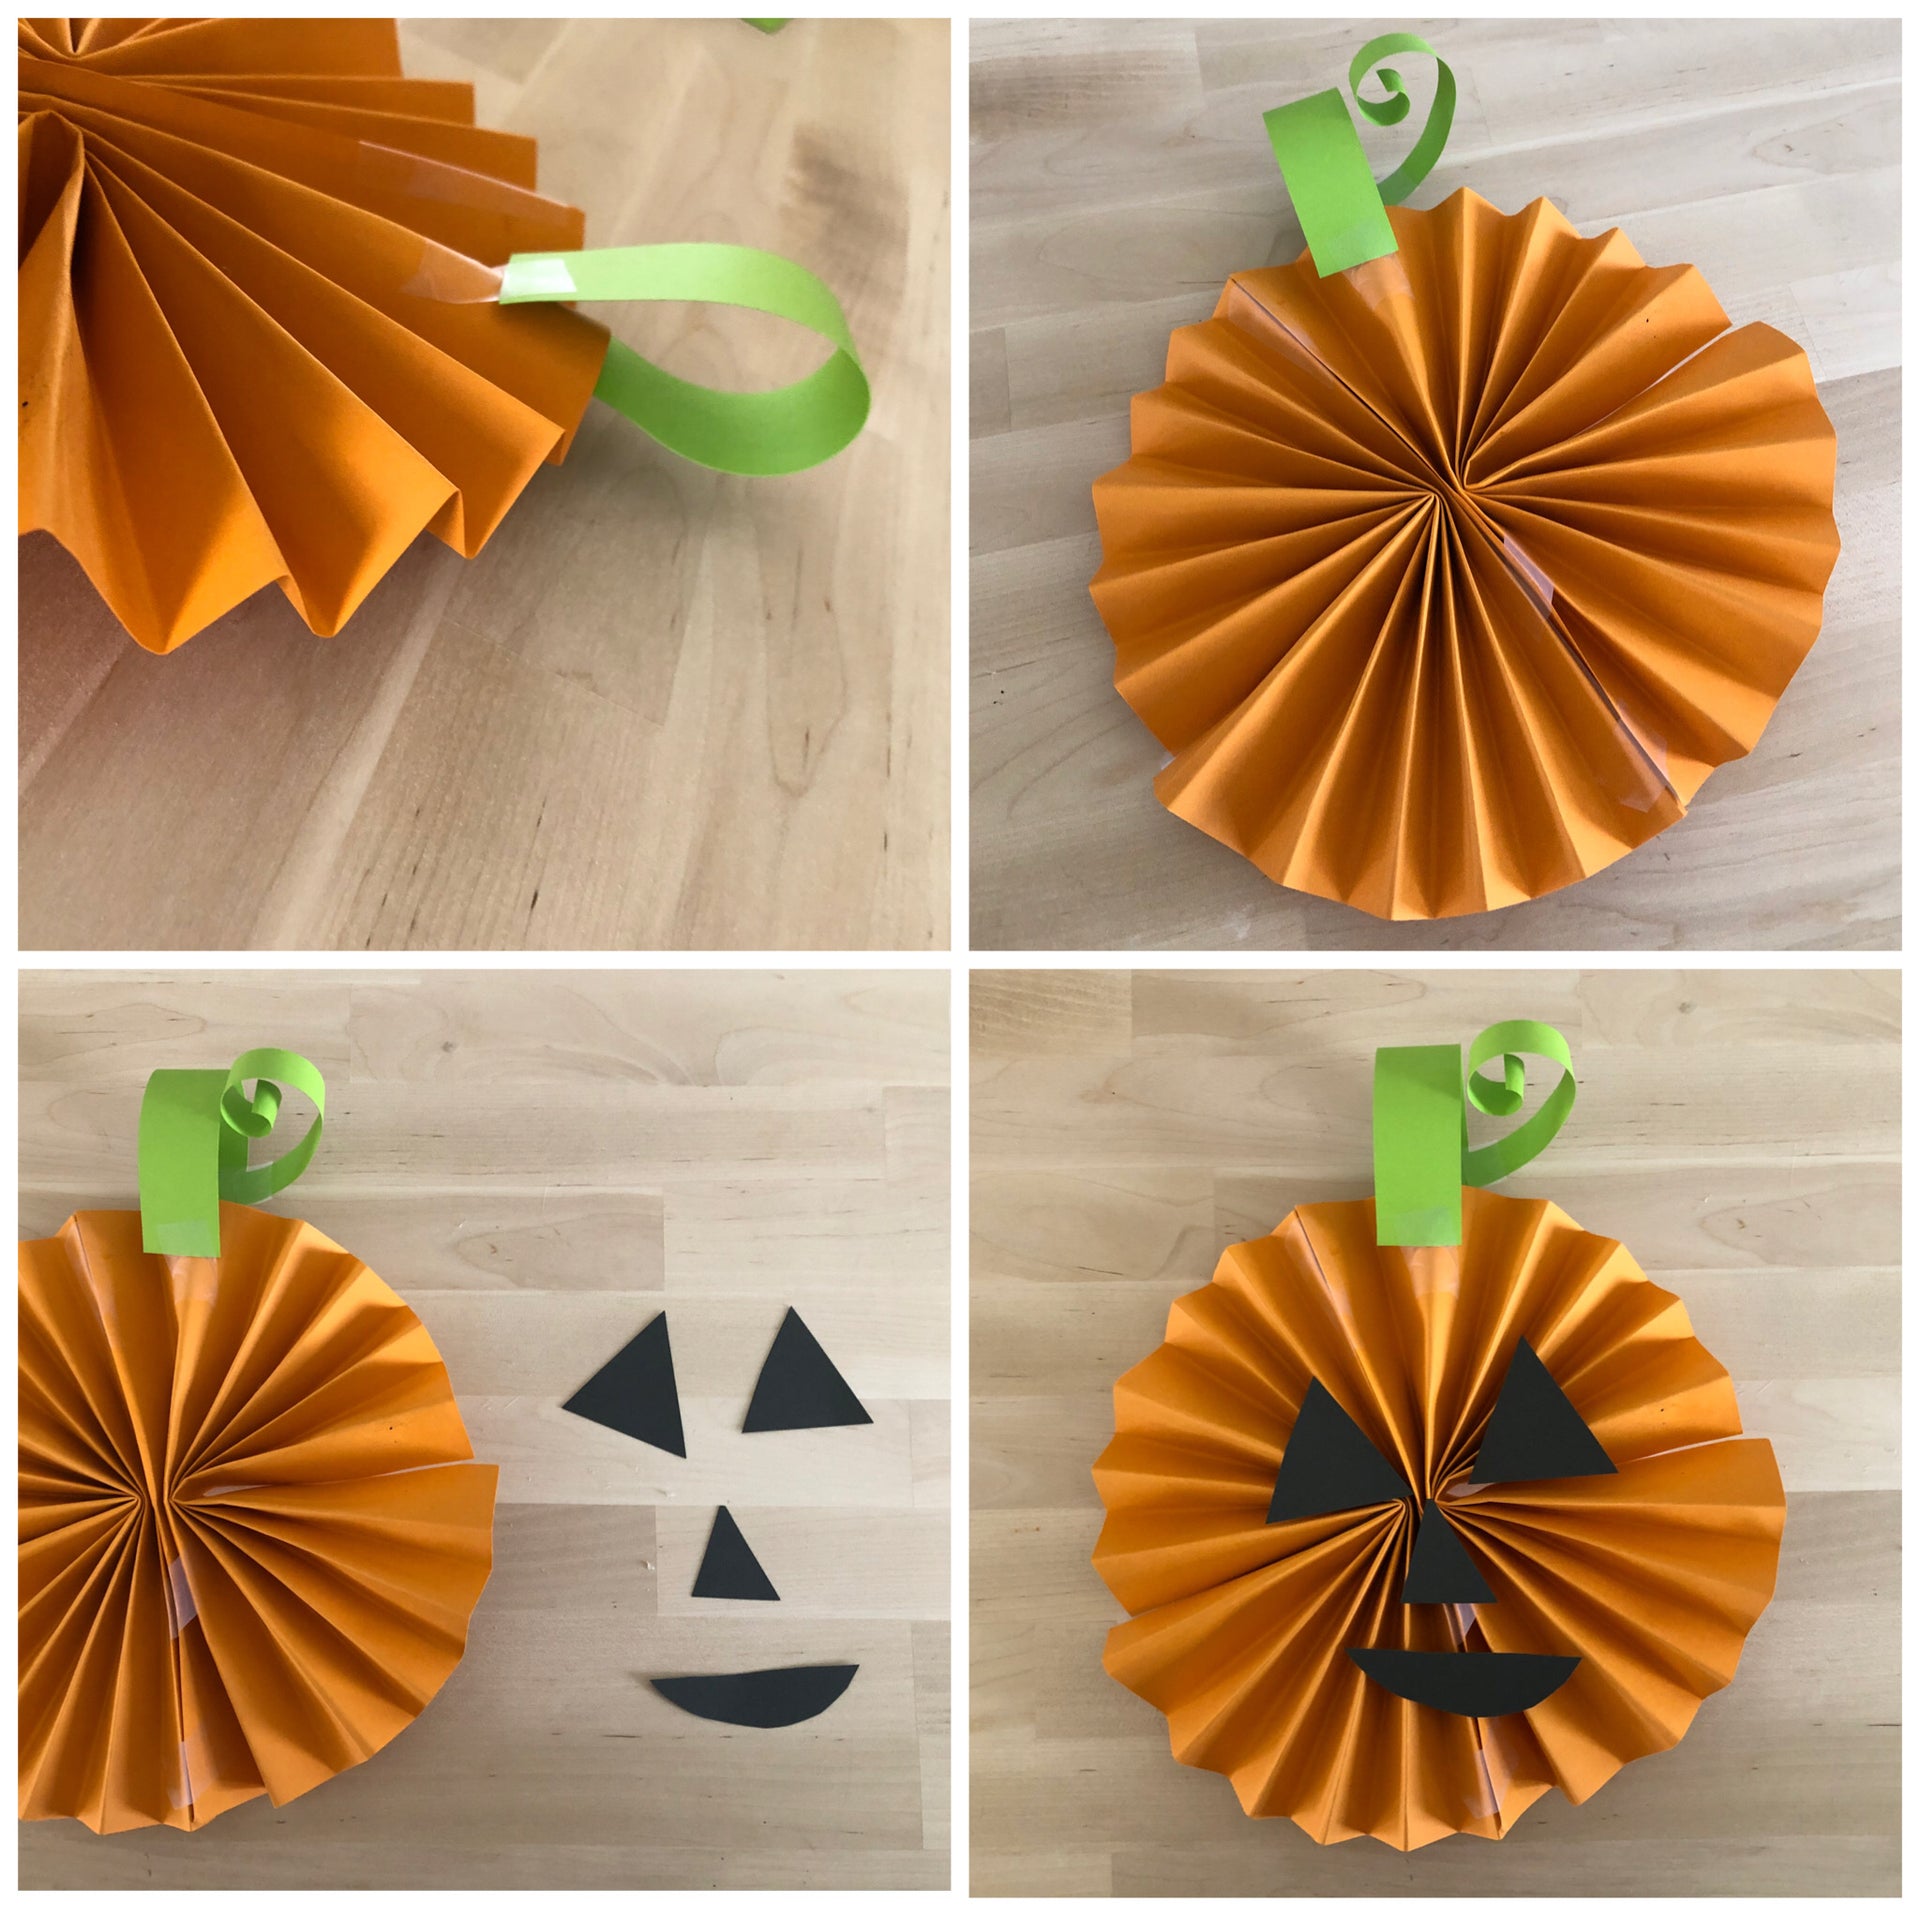
Accordion fold two pieces of paper. Anyone else remember making paper fans as a kid? Do that. After you’ve folded them, gently bend the papers in half.

Step 2:
Tape (or glue for a cleaner look) the folded piece of paper together to make a half circle. Repeat with the second paper. Now tape those two pieces together to complete a full circle.
Step 3:
Cut out a stem. Make sure it’s long enough to fold in half, as this loop is what you will run your string through to create the banner.

Step 4:
Cut out eyes, nose and a mouth and glue them on.
Step 5:
Run your string or yarn through the loops on the pumpkins.

And there you have it. So EASY, right?!? I’m confident that if my 12 year old can do it, you can too!
As alway, tag us in your creations, we love to see how we inspire you!
Happy October!
xo,
Amy